Moving is part of military life, but deciding whether to live on base is one of the most important choices your family can make. The purpose of this guide is to give you as much information as possible so that you can make a well-informed, confident decision.
Service members are familiar with risk assessments, and the same principle applies here: before signing for base housing, take the time to evaluate potential risks and understand your options. Knowledge is power, and preparation is protection.
1. Research the Base and Housing Company
Before accepting a home, learn as much as possible about the installation and its housing.
Check local spouse and community pages. Search for keywords like housing issues, mold, or repairs. Be aware that some housing pages are operated or moderated by the housing companies themselves.
Ask about nearby neighborhoods. Many spouse pages share which off-base areas are safe, affordable, and have strong school systems.
Use the “Hot & Cots” app. It includes honest reviews of base housing, barracks, and dining facilities.
2. Ask About Watch Lists and Oversight
Each branch monitors bases that have significant or recurring housing issues.
Bases with poor performance (frequent work orders, low resident satisfaction, etc.) may be placed on a “watch list” for special oversight.
For example, the Air Force publishes an internal AFCEC Scorecard Watch List each quarter. While these reports aren’t public, you can, and should, ask your local housing office whether your base has been flagged or is under review.
3. Understand the Tenant Waterfall Policy
This policy determines who can live in base housing when units go unfilled.
Homes are offered first to active-duty members. If occupancy drops, they may open to federal employees, retirees, and finally to civilians.
If your base has a high percentage of retirees or civilians in housing, that could be a red flag indicating that active-duty families may be choosing not to live on base.
4. Know the Tenant Bill of Rights (TBOR)
The Tenant Bill of Rights was designed to protect military families, but it currently lacks enforcement mechanisms. If your housing company fails to comply—whether by denying repairs or withholding information—there is little legal recourse. Understanding this before signing can help you have realistic expectations and make informed decisions.
5. Learn the Three Step Process
If problems arise, follow the three-step process:
Submit a service call. Document the issue with photos, dates, and communication logs.
Contact the government housing office (sometimes known as GHO, RCI, MHO, HSO or DPW) if the issue is closed without proper repair or to your satisfaction.
Pursue informal and formal dispute resolution. This process was created to protect residents, but it is only effective if properly documented. Ask for the forms from your local government housing office if you ever need them before signing your lease.
6. Review Your Lease Carefully
You’ll sign a universal lease, but details can vary. Pay close attention to:
Clauses about environmental hazards (mold, lead paint, asbestos, etc.).
Homes with lead-based paint (especially on windows, doors, and trim). These can chip and track lead dust into living areas.
Ask for the age of the home and whether any major renovations met federal and state building code standards. Some bases have had roof or moisture-barrier failures, even in “newly renovated” homes.
7. Research the Housing Company
Most base housing is managed by a Public-Private Venture (PPV), sometimes called a Private Housing Partner (PHP) company. Before moving in, check if the company is:
Involved in DOJ investigations or lawsuits, especially related to environmental hazards or fraud.
Listed in recent news articles about waste, fraud, or abuse in military housing.
8. Understand Federal Enclave Status
Most bases sit on federal land, which means state tenant, landlord, and other civil protection laws generally do not apply. If your family suffers injury, illness, or loss due to housing negligence, you may have limited legal recourse. Congress is currently working to address this gap, but families need to understand and question this status in writing before signing a lease.
9. Request the 7-Year Home History Report
Ask for the full seven-year maintenance and service history of the specific home you’re offered.
Compare that report with what previous tenants share (many are happy to connect via spouse pages) and check state asbestos permit databases.
Be aware: some housing offices have been found to omit service calls made while families were temporarily out of the home.
Look for repeated issues such as mold, leaks, plumbing failures, or HVAC problems, and then ask for more information about each repair.
If the report includes mold- or water-related repairs, ask:
How was the mold and/or water damage addressed? What protocols, procedures, or standards were followed?
Was post-remediation verification, or testing, done to confirm that all materials were dry and free from mold and other microbial growth?
10. During Your Walk-Through
Be prepared to conduct a thorough walkthrough. Ask for a government housing official to be present during the process. Bring the tools below, follow the tips, and download your free copies of “5 Signs of Water Damage,” “Moisture Basics,” and “Checklist: Where to Look for Mold & Water Damage” here.
Flashlight – look for the signs of water damage, pests, damaged building materials, etc.
Moisture meter & hygrometer – look for damp areas and high relative humidity (above 50%), giving special attention in bathrooms, kitchens, and around windowsills and chimneys.
Lead test kit – for older homes built before 1978.
Phone or camera – document all findings. Phones without cases can easily fit into vents with the camera on.
Ask to see the HVAC unit, and inspect the filters, coil, and drain pan along with the area behind and beneath the unit. If access to the HVAC unit is locked or limited, ask to gain access.
Look for stains, odors, ventilation issues, or chipped paint.
Ask to see the hot water heater. Make sure that the pressure relief valve and drip pan are installed.
Check the basement or crawl space for standing water and inquire about sump pumps.
Ask where the carbon monoxide and smoke detectors are (there should be one in every bedroom) and check when their batteries were last changed, if applicable. Learn more about carbon monoxide here.
Ask about attic access, and if able, check for roof leaks and staining.
Ask about:
Age of carpet and flooring.
Date of last HVAC, roof, and plumbing replacements.
Any pending maintenance work orders.
Date of last chimney cleaning.
Consider optional air and water quality testing for mold, radon, and carbon monoxide before moving in.
11. Understand Denial and Waitlist Policies
If a home appears unsafe, you can decline it, but know your rights:
The first denial typically leads to an alternate housing offer.
The second may lower your waitlist priority.
A third could move you to the bottom of the list. Always ask for these policies in writing and document who you speak with. If you turn down a home due to environmental issues, you may not be subject to lowering your waitlist priority.
12. Protect Your Family’s Health
Document all communications—emails, texts, photos, and maintenance records.
If you or your children have medical conditions, consider how environmental hazards could worsen symptoms.
Exceptional Family Member Program (EFMP) families should confirm that housing meets their specific accommodation needs.
Your family’s health and safety come first. Never feel pressured to accept substandard living conditions.
Final Thought
Moving on base can offer convenience, community, and support, but it’s not without risk. The more informed you are, the better protected your family will be. Take time to ask questions, verify information, and advocate for transparency.
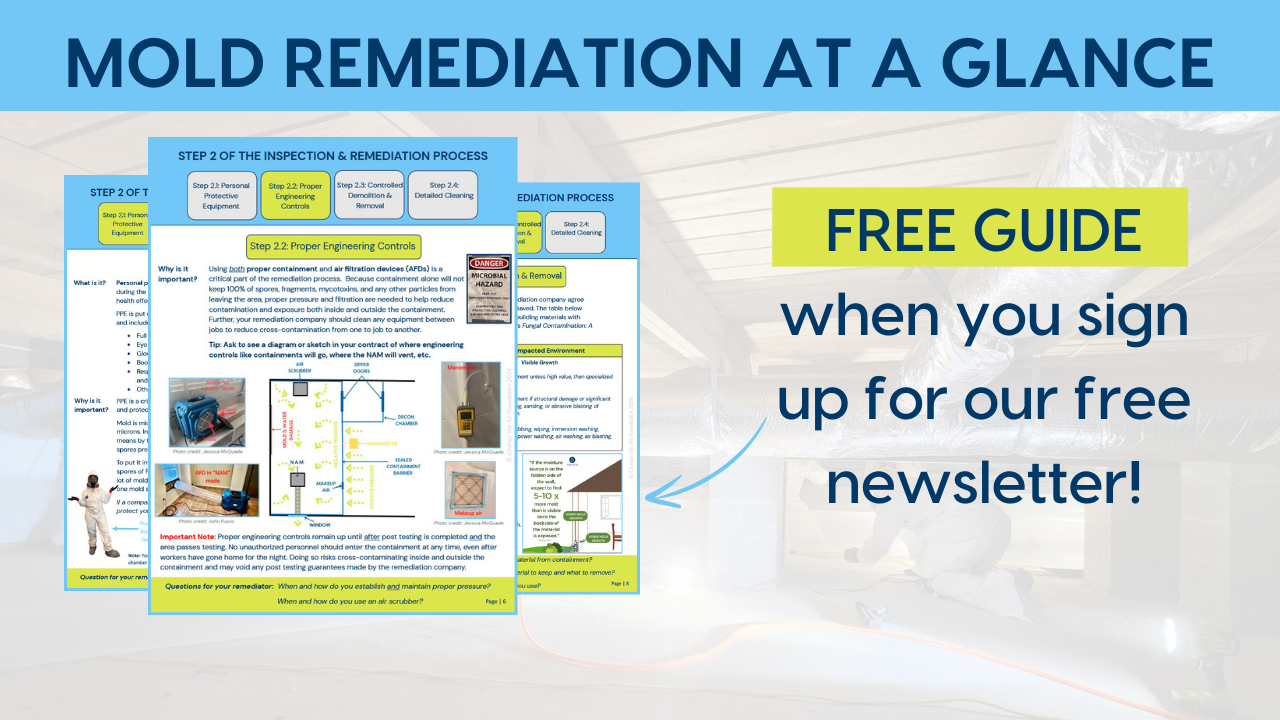
To learn more about safe and effective mold inspections and remediations, visit our “Mold in the Home” feature here and download your free copy of “Mold Remediation at a Glance” here.